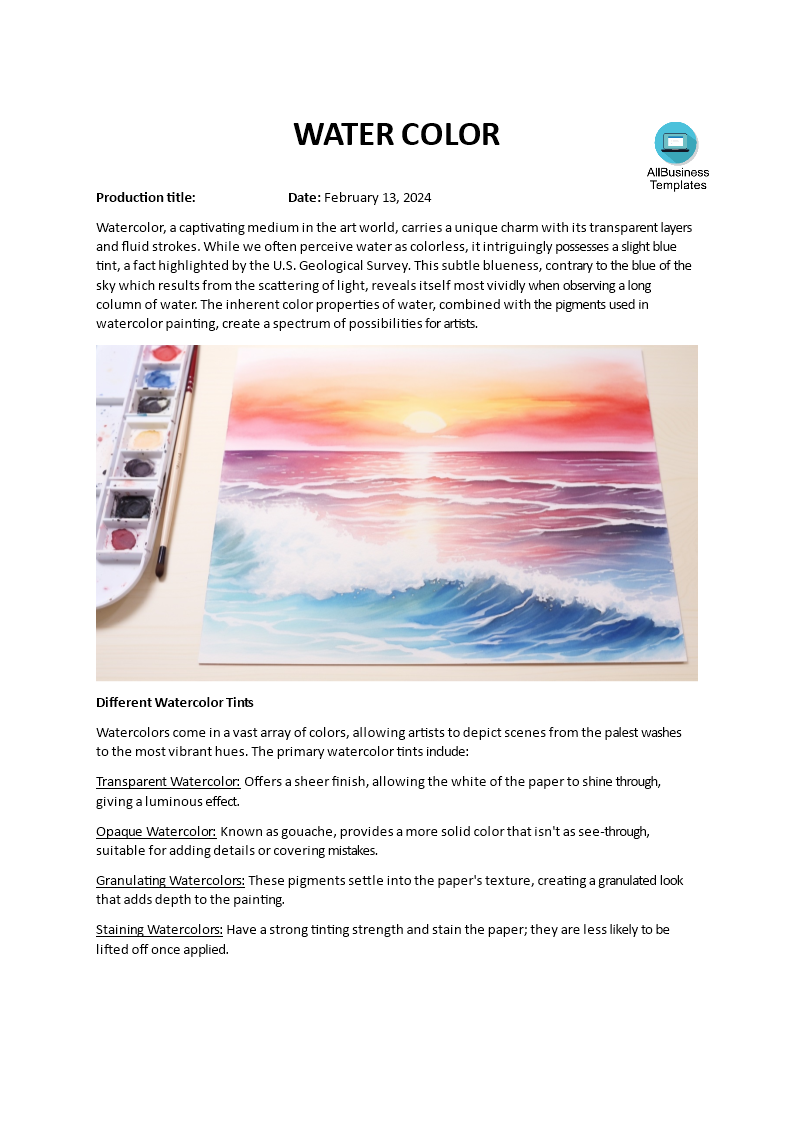
Water Color
Enregistrer, Remplir les champs vides, Imprimer, Terminer!
How to create Water Color? Download this Water Color template and get all the help you need to paint or digitally create water colors.
Formats de fichiers gratuits disponibles:
.docx- Ce document a été certifié par un professionnel
- 100% personnalisable

Life Privé
How to create Water Color?
Creating watercolor artwork, whether digitally or with traditional media, involves understanding how to blend colors and water to achieve the desired effect. Here are some basic configurations and techniques to get you started with watercolor painting:
Traditional Watercolor Techniques:
Wet on Wet: Apply water to the paper before adding color. This technique allows colors to blend and spread, creating soft edges and gradients. It's perfect for backgrounds or creating a sense of light and shadow.
Wet on Dry: Paint directly onto dry paper for more control and sharper edges. This method is ideal for detailed work and adding definition to your painting.
Dry on Dry: Use a barely wet brush and dry paint to create textured effects like grass or branches.
Layering: Start with light washes and gradually build up color intensity and details with additional layers, allowing each layer to dry before applying the next.
Lifting Off: Remove wet or dry paint with a clean, damp brush to lighten areas or create highlights.
Digital Watercolor Configurations: For digital artists aiming to mimic watercolor effects, software like Adobe Photoshop, Procreate, or Corel Painter offer watercolor brushes and settings.
Here's a basic setup:
Here's a basic setup:
Brush Choice: Select a watercolor brush. Many programs offer a variety of watercolor brushes designed to simulate the flow and texture of real watercolor.
Opacity: Start with a lower opacity, around 20-50%, to mimic the transparency of watercolor paint. Adjust as necessary for lighter or more intense colors.
Flow: Adjust the flow rate to control how much "paint" is applied with each brushstroke. A lower flow rate can mimic the effect of adding more water to your paint.
Blending Modes: Experiment with different layer blending modes like "Multiply" for layering colors, as it simulates the color mixing of traditional watercolors.
Texture: Add a paper texture to your canvas to mimic the absorbent quality of watercolor paper and add realism to your digital watercolor painting.
Remember, whether working with physical watercolors or digital tools, the beauty of watercolor lies in its unpredictability and the unique effects you can achieve through experimentation. Start with these basic configurations and techniques, and don't be afraid to explore and develop your style.
Digital arts
Let's consider creating a digital watercolor painting of a sunset landscape using Adobe Photoshop, which provides a rich set of tools for mimicking watercolor effects:
Step 1: Setting Up Your Canvas
Open Adobe Photoshop and create a new document. A common size for digital art could be 2000 pixels by 1600 pixels with a resolution of 300 dpi to ensure high quality. Before starting, you might want to add a texture overlay to your canvas that resembles watercolor paper. This can be done by placing a high-resolution paper texture image on your first layer and setting its blending mode to "Multiply" or "Overlay" to let the paint layers beneath show through the texture.
Step 2: Selecting Your Brushes
Choose a watercolor brush from Photoshop's brush presets. Photoshop CC comes with Kyle T. Webster's watercolor brushes under 'Kyle's Brushes' > 'Kyle's Real Watercolor'. For our sunset landscape, start with "Kyle's Real Watercolor - Spatter" for the sky and "Kyle's Real Watercolor - Soft Edge" for broader washes.
Step 3: Color and Opacity Settings
For the sky, pick a warm color palette. Start with a light yellow (#FCEBB6) at an opacity of 20-30% for the base. Use the "Kyle's Real Watercolor - Soft Edge" brush for this.
Add oranges (#FCAB64) and pinks (#F78D9F) with the same brush but change to "Kyle's Real Watercolor - Spatter" to add texture to the clouds at an opacity of 40-50%.
For the land, use a darker shade (a mix of dark blue #3A506B and purple #5E4B56) with "Kyle's Real Watercolor - Detailer" brush at 50-60% opacity for sharper edges and details.
Step 4: Layering and Blending
Work on separate layers for each major part of your landscape (e.g., one layer for the sky, another for the land). This allows you to adjust each part without affecting the others.
Use blending modes to your advantage. For example, setting a layer with sunset colors to "Multiply" can create a deeper, more vibrant effect when overlaid on the base colors.
Apply water effects sparingly with "Kyle's Real Watercolor - Wet Edge" brush on a new layer above your painted areas to blend colors further and add a wet into wet effect.
Step 5: Finishing Touches
To add final details and sharper elements like trees or birds, reduce the brush's opacity to about 70-80% and choose a finer tip from the watercolor brushes.
You can adjust the overall contrast and color balance through adjustment layers (Layer > New Adjustment Layer > Levels or Color Balance) to enhance the sunset effect.
Your digital watercolor sunset landscape should now boast soft, blended transitions between the warm colors of the sky, textured clouds, and a darker, detailed foreground, all while maintaining the characteristic translucent and fluid appearance of traditional watercolor.
Remember, the key to digital watercolor painting is experimentation with brushes, opacity, and blending modes to achieve the desired effect. Each project can be a new opportunity to explore different settings and techniques.
Download this Water Color template and get all the help you need to paint or digitally create water colors.
AVERTISSEMENT
Rien sur ce site ne doit être considéré comme un avis juridique et aucune relation avocat-client n'est établie.
Si vous avez des questions ou des commentaires, n'hésitez pas à les poster ci-dessous.